


Whether you're looking to jazz up your garden path, kitchen backsplash, or just create a unique piece of art, installing mosaic art can be a rewarding DIY project.
In this blog, we'll guide you step by step through the process of installing your very own mosaic masterpiece. From choosing your mosaic art piece to grouting the finished work, we'll cover all the essential tips and techniques you'll need to know. Unleash your creativity and get ready to transform ordinary surfaces into works of art. Ready to learn how to install a mosaic?!
Let’s start with the video tutorial so you get an overview. We'll dive in with more details below:

A mosaic is a design that’s comprised of many small, often colorful, pieces made from various materials such as glass, ceramic, stone, or even metal. These stones are usually arranged in a pattern or design to create a larger image or surface covering.
The beauty of a mosaic is that they are versatile and can be used to adorn floors, walls, ceilings, and even furniture. Mosaic art are popular in bathrooms, kitchens, and other areas where a visually striking and durable surface is desired. They can even be used outside!
MOSAIC INSTALLATION SUPPLIES
1- Mosaic Art (floor)2- Mosaic Art (transition)
3- Tape measure
4- Metal lath (3 sheets)
5- Tin snips
6- Cut protective gloves
7- Rub brick
8- Staple gun
9- Utility knife or Exacto knife
10- Tile nippers
11- 1/8″ Notched trowel
12- Rubber grout float
13- Sponge
14- Tile adhesive
15- Utility cutting tool
16- Loctite construction adhesive
17- Grout un-sanded in the color Bone
18- Microfiber towel
19-Tile enhancer and sealer
Discover the beauty of our handcrafted floral pattern mosaic art at Mozaico. With an extensive variety of designs sorted by theme, finding the ideal mosaic for your space is a breeze.
At Mozaico, personalization is at the heart of what we do. Whether it's resizing a mosaic art piece to seamlessly fit your specific area or customizing the colors, shapes, and overall design, our skilled craftsmen are equipped to bring your vision to life. Crafted with precision and care, each Mozaico piece reflects 21 years of artistic tradition backed by our commitment to excellence.
STEP 1- PREPARATION
The first step in how to install mosaic art, start by preparing the subfloor. To do this, ensure that the subfloor is clean, dry, level, and free of any debris. Repair any cracks or imperfections in the subfloor. An uneven subfloor can result in cracking tiles, so having a good foundation is important
STEP 2- METAL LATH FLOOR FOR MOSAIC LAY
Now that the floor is prepped, let’s add metal lath to the floor. If you’re wondering why, it’s to enhance the stability, strength, and durability of the surface. This will help prevent cracks in the mosaic and increases the load bearing capacity. Essentially, this will help it last forever.
STEP 3- LAYING OUT YOUR MOSAIC ART
Once the preparation is done, plan the layout. Before beginning install, it’s important to lay out the mosaic to make sure it’ll fit how you ordered it!
STEP 4- LAY THE MOSAIC
Next, apply thinset mortar: Use a notched trowel to apply thinset mortar onto the subfloor in sections. This mosaic came in three rolls so we're doing one at a time. Make sure to only apply enough mortar that you can work with before it dries.
Let the mosaic dry 24 hours so it can fully set.
STEP 5- FILL IN MOSAIC HOLES
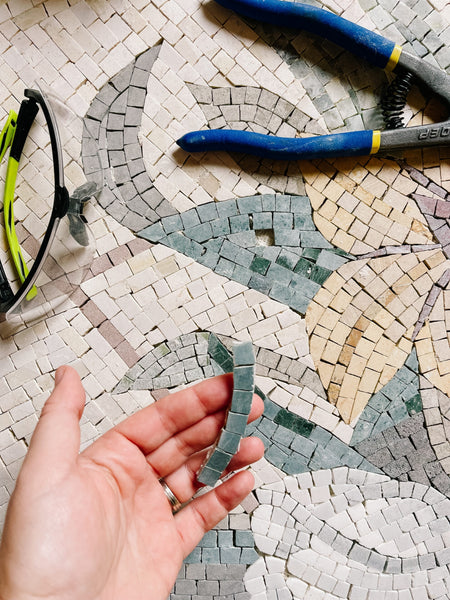
When the mosaic arrives, it comes with extra tiles. If needed, cut mosaic stones with a nipper to cut stonea to fit around the edges of the floor or any holes in the mosaic.
When we laid in the last section of the mosaic floor, we filled in holes so the wet tile adhesive holds the little pieces in place.
STEP 6- MOSAIC GROUT
And now, that the mortar is dry, apply unsanded grout. Use a grout float to apply grout over the mosaic, pressing it into the gaps between the stones. Make sure to fill all the gaps completely.
After the grout has set for a short time (15-20 minutes), remove excess grout. Use a damp sponge to wipe away grout from the surface of the mosaic. Rinse the sponge frequently in clean water to ensure a smooth finish.
Once the grout has dried for a few hours, give the mosaic a final cleaning with a microfiber towel to remove any remaining grout haze.

STEP 7- SEAL THE MOSAIC ARTPIECE
Finally, seal the mosaic. To finish off the mosaic, apply an enhancer and sealer 3 days after the piece is installed. This protects the mosaic art from absorbing stains for up to 3-5 years. Since the mosaic is honed, it’s more prone to staining so this helps protect the surface. It also brings out the color of the natural stone.
To apply, wipe the sealer on with a white, clean, lint-free rag. Wait 3-5 minutes and then wipe off the excess. Repeat once.
It is art that doubles as a floor and we think the pattern will be such a pretty focal point of the room.
The floor is gorgeous and we are so proud of it!
Throughout our guide, we've explored the essentials—from selecting the right materials and designing your layout to the precise application and aftercare of your mosaic masterpiece. With these tips and techniques in hand, you are now equipped to approach your mosaic art installation with confidence and creativity. Explore our exquisite mosaic art design collection and envision the transformation of your space!